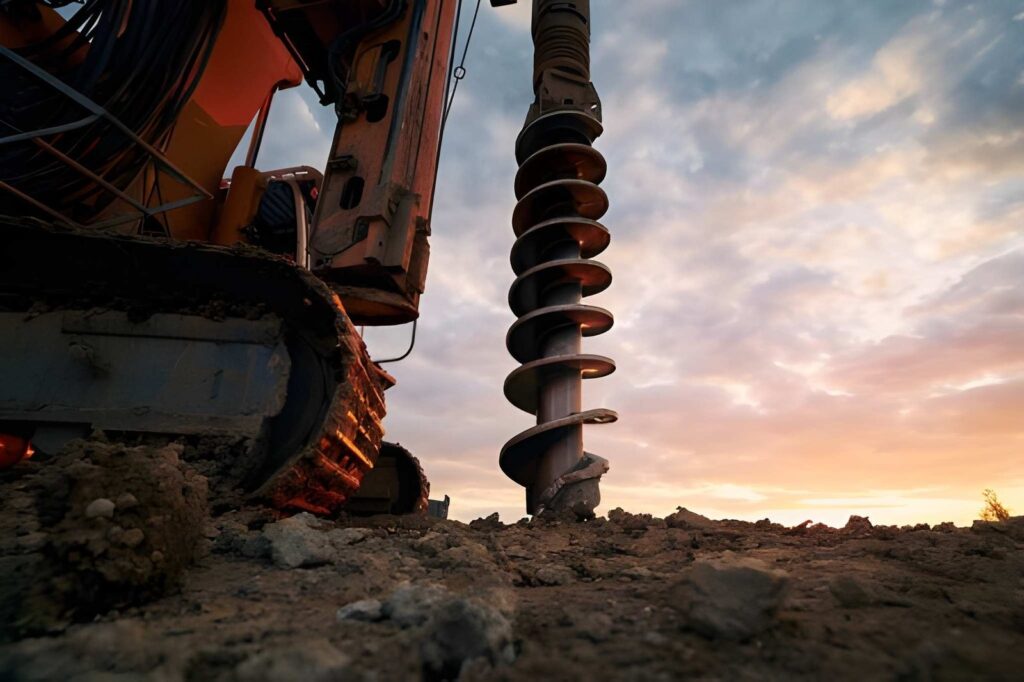
If you’ve ever spotted a crew working on a road, footpath, or public reserve — drilling away without a single trench in sight — chances are you’ve witnessed HDD drilling in action. Horizontal Directional Drilling, commonly referred to as HDD, has become one of the most widely adopted trenchless technologies in Australia’s civil, utilities, and construction sectors. Whether you’re a project manager, a property developer, or simply someone curious about how pipes and cables end up under roads without tearing them up, this guide has got you covered.
What Is HDD Drilling?
HDD drilling is a trenchless method of installing underground pipes, conduits, and cables along a predetermined bore path — without the need for surface excavation. The process uses a steerable drill string guided by a highly accurate tracking system to bore beneath the surface at controlled angles and depths.
Originally developed in the United States during the late 1970s for oil and gas pipeline crossings, HDD drilling has since evolved dramatically. Today, it’s used throughout Australia for a wide range of applications — from telecommunications and water mains to gas pipelines and electrical conduits. It’s particularly valued in urban environments where open trenching would cause significant disruption to traffic, communities, and existing infrastructure.
How Does HDD Drilling Work?
At its core, HDD drilling involves three distinct phases: the pilot bore, reaming, and pipe pullback. Each phase plays a critical role in ensuring a clean, accurately placed, and structurally sound underground installation.
Step 1 — Pilot Bore
A small-diameter drill bit is guided along the designed bore path using a steerable drilling head. This head is tracked electronically from the surface using a walkover or wireline locating system, allowing the operator to steer the drill with precision — navigating around underground obstacles and staying within the design tolerances.
Step 2 — Reaming (Pre-Reaming)
Once the pilot bore exits at the receiving pit, a larger reaming tool is attached and pulled back through the bore hole. This step progressively widens the bore to the required diameter — typically 1.5 times the outer diameter of the pipe to be installed. Multiple passes may be required for larger diameter installations.
Step 3 — Pipe Pullback
The product pipe (or conduit bundle) is attached to the drill string via a swivel and pulled back through the bored hole in a single continuous operation. The swivel prevents torsional stress from being transferred to the pipe, ensuring it arrives undamaged and correctly positioned.
Throughout the entire HDD drilling operation, drilling fluid — typically a bentonite slurry — is continuously pumped into the bore. This fluid serves multiple purposes: it stabilises the bore hole, lubricates the drill string, cools the cutting head, and carries drill cuttings back to the entry point for disposal.
Common Applications of HDD Drilling in Australia
HDD drilling is one of the most versatile installation methods available, and its applications continue to grow as the technology improves. In Australia, you’ll commonly see it used for:
- Telecommunications conduits — Installing NBN and fibre optic cables beneath roads and footpaths without service interruption.
- Water and sewer mains — Crossing rivers, creeks, roads, and other sensitive areas where open trenching would be impractical or prohibited.
- Gas distribution pipelines — Installing medium and high-pressure gas mains in urban corridors.
- Electrical power conduits — Running high-voltage cables beneath major intersections and road crossings.
- Environmental remediation — Installing extraction wells and monitoring conduits at contaminated sites.
- River and tidal crossings — Crossing waterways without disturbing aquatic ecosystems or requiring in-water works approvals.
Advantages and Limitations of HDD Drilling
Like any construction methodology, HDD drilling comes with its own set of advantages and limitations. Understanding both sides will help you make an informed decision about whether it’s the right method for your project.
| ✔ Advantages
• Minimal surface disruption — roads, gardens, and paving remain intact • Faster installation compared to open cut in many scenarios • Reduced environmental impact, particularly near waterways • Lower restoration costs — no need to reinstate large excavations • Can be used in poor weather or wet ground conditions • Navigate around existing underground services • Reduced risk to traffic and community safety |
✘ Limitations
• Higher upfront equipment and mobilisation costs than shallow open trenching • Requires experienced operators and precise pre-planning • Frac-out risk in unstable soils • Not suitable for all soil types without proper assessment • Limited ability to change design once drilling commences |
What Equipment Is Used in HDD Drilling?
HDD drilling relies on a suite of specialised equipment. The main components of an HDD rig setup include:
HDD Drilling Rig: The heart of the operation, available in mini, midi, and maxi configurations depending on bore length, diameter, and soil conditions. Mini rigs are used for shallow residential or suburban bores, while maxi rigs can handle large-diameter crossings over hundreds of metres.
Drill Pipe: High-strength, threaded steel pipe sections that transmit rotational force and fluid pressure from the rig to the drill head.
Drill Head / Steering Tool: A specially designed bit with a slanted face that deflects the bore in a chosen direction when not rotating. When rotated, it drills straight ahead.
Locating System: Either a walkover tracker (used on shallow bores) or a wireline system (for deeper, longer bores). These systems relay real-time position data — depth, pitch, roll, and azimuth — back to the drill operator.
Mud Mixing and Recycling System: Used to mix bentonite drilling fluid to the correct viscosity and recycle used slurry to reduce waste and cost.
Vacuum Excavator: Used to safely expose existing services at entry and exit pits, and to clean up spoil and used drilling fluid on site.
Soil and Site Conditions That Affect HDD Drilling
Not all ground is created equal, and HDD drilling performance varies significantly depending on soil type, rock hardness, groundwater levels, and the presence of existing underground services. A thorough geotechnical investigation prior to any HDD project is not just best practice in Australia — on larger projects, it’s typically a contractual requirement.
Soft clays and sands are generally the most favourable soil types for HDD drilling, offering predictable drilling behaviour and good bore hole stability when the right bentonite mixture is used. Harder soils, cobbles, gravels, and rock formations require specialised tooling such as DTH (Down-The-Hole) hammer systems or rock reamers, which increase project cost and duration.
Regulatory Considerations in Australia
In Australia, HDD drilling projects are subject to a range of regulatory frameworks depending on the jurisdiction, asset type, and location. Relevant considerations include:
Dial Before You Dig (DBYD): All HDD projects must include a formal service location process to identify and avoid existing underground utilities.
Environmental approvals: Projects near waterways, heritage sites, or environmentally sensitive areas may require additional approvals under state or federal environmental legislation.
Road authority permits: Work within road reserves requires a works in road (WIR) permit from the relevant road authority — whether that’s a local council, Transport for NSW, VicRoads, TMR, or similar.
Work Health and Safety: HDD operations must comply with relevant WHS legislation, including safe systems of work for underground services, plant operation, and working in or near excavations.
HDD Drilling vs Open Cut: Which Is Right for Your Project?
The decision between HDD drilling and conventional open cut excavation comes down to a combination of cost, programme, ground conditions, environmental impact, and community sensitivity. As a general rule, HDD drilling becomes the more cost-effective and practical option when crossings involve sealed roads, waterways, railway corridors, or environmentally sensitive land — and when the bore length justifies the rig mobilisation cost.
For short, shallow runs in accessible greenfield areas, open cut may still be the more economical choice. A reputable contractor or civil engineer will be able to assess both options and provide a recommendation based on your specific project parameters.
HDD drilling has fundamentally changed how Australia’s infrastructure is built and maintained. It has made it possible to install critical underground services beneath rivers, highways, and built-up urban areas with minimal disruption and environmental impact. As Australia’s cities grow denser and the demand for new utilities infrastructure increases, HDD drilling will only become more central to how we deliver projects efficiently and sustainably.
Frequently Asked Questions
Q: How deep can HDD drilling go?
The depth achievable with HDD drilling depends on the size of the rig, the soil or rock conditions, and the bore path design. Mini HDD rigs typically operate at depths of 1–5 metres for suburban bores, while large maxi rigs can bore to depths exceeding 50 metres for major crossings such as rivers or railway corridors.
Q: How long does an HDD drilling project take?
The duration of an HDD project varies based on bore length, diameter, soil conditions, and the number of product pipes being installed. A simple 50-metre residential bore may take just a few hours, while a 500-metre maxi bore through mixed soil and rock can take several days. Your contractor will provide a programme specific to your project scope.
Q: Is HDD drilling suitable for all soil types?
HDD drilling works best in soft to medium soils such as clay, silt, and sand. Hard rock, cobbles, and highly variable ground conditions can make HDD drilling more challenging and expensive, but specialist tooling — such as rock reamers and DTH hammer systems — can extend the method’s capability in difficult ground. A geotechnical investigation before the project is highly recommended.
Q: What is a frac-out and how is it prevented?
A frac-out (or inadvertent return) occurs when drilling fluid under pressure fractures the soil and returns to the surface — sometimes at unexpected locations. It’s most common in shallow bores in soft soils. Prevention strategies include careful drilling fluid management, maintaining appropriate bore geometry, monitoring fluid pressures during drilling, and conducting a thorough soil assessment prior to commencing work.
Q: Do I need council approval for HDD drilling in Australia?
In most cases, yes. If your HDD bore is within a public road reserve, you’ll need a works in road permit from the relevant road authority. For projects near waterways, heritage areas, or state-controlled roads, additional approvals may be required. Your contractor or project manager can assist with identifying the relevant permit requirements for your specific location and project type.
Q: What size pipes can be installed using HDD drilling?
HDD drilling can accommodate a wide range of pipe sizes — from small 25mm conduits for fibre optic cables right through to 1200mm diameter HDPE pipelines for major water or sewer installations. The limiting factor is typically the bore diameter achievable with the available rig, which is directly related to the pull-back force and torque the machine can generate.
Q: How accurate is HDD drilling?
Modern HDD tracking systems are highly accurate. Walkover locating systems typically achieve positional accuracy within 30–50mm in depth and horizontal position on short bores. Wireline systems used on longer and deeper bores can achieve even tighter tolerances, making it possible to navigate congested underground environments and hit small target windows at the exit pit with confidence.